Tuesday, March 31, 2009
 "Always Birthday card"
 Nicole and Brad's New home in Omaha
Happy Tuesday Everyone!
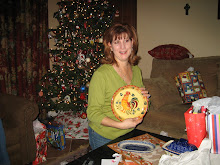
I have been away for a while, I was out of town visiting my Daughter, Nicole and SIL Brad. They just bought a " new" house in Omaha, Nebraska and I was there for a week helping them paint, and get things unpacked and organized. I was a lot of work, but also a lot of fun!! It was good to be able to see their new home and surroundings. I like, uhum.. (need) to see where they live and that they are well and happy in their new place. My SIL works for the Air force , so they move around a lot. I guess that "Mother's need to supervise" everything your child is doing never really leaves you! Poor Nicole! I don't give her enough credit , She has been in foreign countries and in the Iraq war and lived away from home for 7 yrs, but still I'm not comfortable until "I" see that she is okay. In reality, She is so much more capable than I ever was, or am still !! And, I absolutely know this, it's just the "Mom" thing, I guess.
My Daughter's Birthday was St. Patrick's Day, and I wanted to share the card I made for her with all of you. I got the idea from a card I saw on Jennifer Meyers blog , and I immediately knew I wanted to make it for Nicole's Birthday card. I used the "Always" set from SU! and the "Sweet Always" DSP, also from SU! The delicate branches the bird is nesting in were made from the Martha Stewart Branch punch. I added a Pink faux diamond for a little festive Birthday Bling! After all, every girl loves a little Bling! LOL I used my new Scalloped Eyelet Border punch from SU! and the Big Shot Top Note Die to frame the sweet little bird. Inside I used more Sweet Always DSP and placed the sentiment in a large scalloped Circle I punched out using the " Lrg Scalloped Circle punch by Mary Uchida" I inked the edges using a sponge daubber and some pink pirouette ink , also SU!, I placed " pretty in pink" grosgrain ribbon across the top of the inside flap and threaded a sweet little heart shaped paper clip on to the ribbon. I think it gives it a nice touch. I used just a tiny bit of stickles, in "Diamond" ( it may be hard to see in the photo) to add just the right bit of sparkle to the branches and on the details on the bird' s wing. All this was mounted on plain white cardstock. I gave it to her with her gift of Shamrock Polish Pottery . She had a few pieces of it already and I just brought her more mugs and some dessert plates in that pattern to complete her set. It's very pretty, tiny green shamrocks on a cream background. Now , she can have something very pretty to set the table with when her friends and new neighbors come over for Coffee. And, it is totally appropriate for her Irish heritage and St. Patrick's Day Birthday! Well, I'm off to finish yet another project for my niece, Savannah's Brownie scout troop. I'm making 100 bookmarks for her "around the world" night booth......More on that later. I will post some pics of those when I get them finished.
Have a wonderful DAY !! and thanks for stopping by!
Heidi
Thursday, March 12, 2009

Girl Scouts/Brownie camp - out swap
 Hello Everyone,This is a Pin I made for my 8 yr old niece to swap at her Brownie/Girl Scout Camp-out that she attended last weekend. The girls were to make pins to swap with each other. So of course, I had to help! This is the size of an ATC roughly 3" 1/2 X 2" 1/4. I used the retired "Merry & Bright" set as it had all the elements I needed ( pine trees, deer) in a tiny size. I just love this set, I use it alot for gift tags and giftables at Christmas time. The darling little snowman fits perfectly on a peppermint patty when placed on the scallop circle. so cute for a little something beside a dinner plate or in a little gift bag of goodies!
Well, back to the card/Pin , I used Close to cocoa for the base, pinked around the edges. Then I adhered a 2"X 3" piece of Baja Breeze to it. I stamped the blue piece with the pine bough stamp found in "Definately Decorative Pines " set ( also retired) I stamped the Pine Bough in a bronze using a Color Box stamp pad that I had on hand, next, I placed a 1" 1/4 X 2" piece of "Always Artichoke" ( with my stamped images on it) to the blue piece. I paper pieced the deer with some light brown paper I had that had a sort of leather look to it. I think it was from the "Once Upon A Time" stack by DCVW. I paper pieced the pine trees with some green paper I had from another stack I got from Michael's a long time ago. I added stickles to the trees, and lightly to the deer to give it just a little bling. (Little girls love bling! and so do Big Girls!) I darkened the antlers and legs and tree trunks with Close to cocoa markers so they would show up a little more. I Placed the sticks around the edges with "Zip DRY,"( it seeemed to hold the best.) I actually went around my backyard and picked up sticks! The things we do for love! The "friend" plaque I stamped using" close to cocoa" ( CTC) on that same mottled brown paper that I did the deers in. I added stitch marks around the edges with my CTC marker and added just a hint of stickles in a bronzey color,( like the deers.) the sentiment is from the retired "Noteworthy" set. I know, all retired sets, but I had to go with what would work for this tiny project. I glued the Friend plaque to the corner using "Zip Dry". And on the back, (not shown) I glued on a pin back (you get them in a bag at Michael's or JoAnn's) and Voila! an official Brownie camp-out Pin to swap!
I am happy to report that they were a big hit. The girls loved them, and quite a few of the leaders too, according to my sister. I should have put my Stamping Up! info on the back, but I didn't. It was just for my niece. Oh well..... ! Now I must get to my stamp room and finish my swaps for our downline meeting tonight!
Hugs, Have a great Day! and thanks for stopping by.
Heidi
Wednesday, March 11, 2009
 Good morning! Happy Wednesday! I hope everyone is off to a Great Day. These are some folders I made for the Ladies in my women's Bible Study. We are currently studying the book of Daniel with the Beth Moore series. It is reallly good. It is all about Babylon and the over-indulgence of that culture. It really parallels our culture in alot of ways. I find it so interesting to see that times change, governments change, but people and human nature remain the same. Anyway , back to the project, I bought some regular school folders and covered them with some paper I had in my stash and some retired DSP from SU! I stamped a little saying on the front using SU! stamps "so very" and " Blessed". I added a few punched circle and a little bling to spice them up. inside the folders already had built in side pockets, so I just added a little of the same paper to each of those to give it a finished look. Inside I put some lined notebook paper so they could take notes. To go with the folders I made some bookmarks from those giant gold paper clips that you can buy from Staples, or Office Max. I added some circles using my scalloped punch and my lrg circle punch (SU!) and adhered them with double sided tape. Hope they like them. Well I am off to finish my swaps for our March downline meeting tomarrow. Have a good day and thanks for stopping by! p.s. see the pic below to see the Clips
 These are the clips I embellished to go with the decorated folders. I used my SU scalloped circle punch and my 13/8 circle punch . I stamped the image on the 13/8 circle and added some bling or a ribbon.i think they will not only look pretty with the folders, but they will be useful too.
Sunday, March 8, 2009
Ebony and Ivory
 Hello, I hope everyone had a fun and relaxing weekend. Here is something I worked on this weekend while I had some time to be creative. I have been wanting to do something black and white, but have been kind of hesitant to try. I have been following Kelly Lunceford's blog "Flutter by Atomic Butterfly" and I really love the vintage cards she creates. I decided to try my hand at one, in black and white. Here is the finished product! what do you think ? I used SU paper in Black, Very Vanilla, and River rock. I stamped the River Rock paper with SU's French Script (retired) . The sentiment "sweet" is also Stampin Up, but I can't remember the set off hand. For the border, I used the scalloped punch. The black and white paper is non-SU , from Creative Imaginations. The ribbon was taken from my stash, as were the buttons. I really love the little red Rose button I used for the middle of the bow. I thought it was so sweet and I wanted to use it somehow in my design. Hence, the red accents.
I hope to be able to post something at least every couple of days, but I'm just learning the ropes on the computer, and I need quite a bit of help. My DH is helping me , but since he does computer work all day , I try to find a time when he is not to tired to help me. I know I exasperate him by being so slow to learn stuff. It is second nature for him, so It must be torture trying to teach me! LOL! Well, tomarrow is the start of another work day, so I better get to bed. Thanks for stopping by!
Subscribe to:
Comments (Atom)